My "Aunty" Em was visiting the other day and we started talking about photos and post-production editing. As is the case with most things, that which we haven't tried can seem really unknown and tricky. But it doesn't have to be! If you're willing to have fun and play with it you can do wonders! :D
Honestly?
I'd rather be shooting photos than editing them. Ken Rockwell has taught me a lot through reading his articles and he's always the first place I go to check out gear review. It was through reading one of his articles that I learned to change my custom setting to slightly warmer white balance and bump up the saturation a little. But before I lose you through techno speak.. reading your manual is really helpful! LOL And just change your setting to vivid or whatever you have on there that stands for Jacked Up Colour ;) I then shoot like that. And do my usual post-photo editing.
What do I use?
Ok.. I use the fairly simple Microsoft Office Photo Manager at the moment. Cause I'm cheap and that's what is on the computer that got passed down to me a couple years ago. Whatever you have on your computer will work. And for years I shot with a simple little point and shoot. It's still what I use most often though right now kind people seem to really like lending me their DSLRs to play with. (Oh how they tempt me!)
What do I do?
When it comes to editing afterwards I usually bump the contrast up a little bit, drop the colour saturation down a little bit, and occasionally drop the bottom dark tone to give some more shadow and depth. Yep.. that's really it.
Example? Ok! How'd I end up with that photo up top? Well... we'll start with the original and then basically apply the above to differing degrees. Play with it and you'll find your style/place.
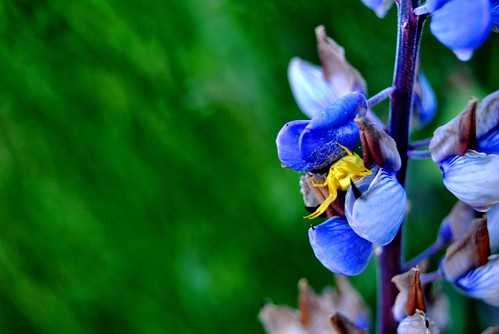
Here's the original. Shot straight up with no custom settings or anything.
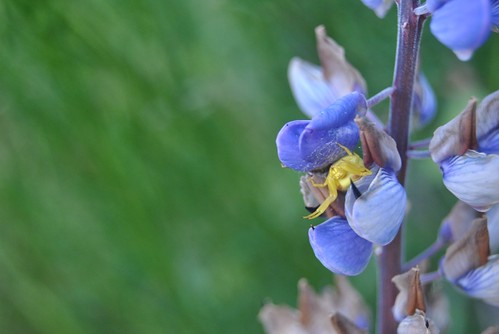
A little bit of contrast, some saturation bump (up a titch I believe) (titch being a very technical term)
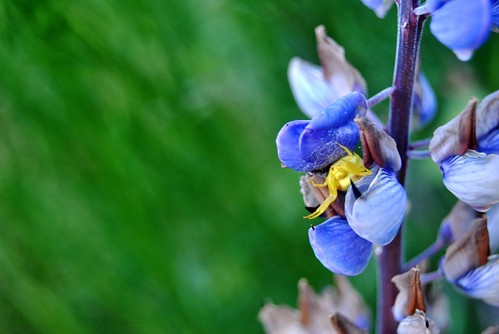
Then dropping the mid-tone and bottom a bit for some deeper dark wonder to let us see the subject better. (Making the image more "simple" if you will ;) )
There you have it! Tada! Just a little funking around to go from that first image to the last one. That took me about 20 seconds.
Most people stop there. But realize that working with a photo isn't about just recreating/capturing that neutrally coloured moment and jazzing it a bit. Have fun and play around! Experiment and try funking it up. Rotate it. (I admit to liking to skew perspectives a bit.)
And then you can end up with something like this.
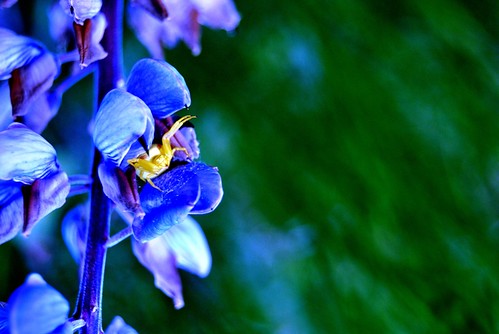
(The picture is turned upside down and now the spider looks all MWAHAHAHAHAHA)
Have fun! It's allowed and encouraged and you don't have to show anyone the ones you don't like, honest. :)
No comments:
Post a Comment